I suspect most fishermen use fewer than half the features on their electronics because, like me, they are too busy using their units to learn how to use them.
I start things out right when I receive a new unit for testing. First, I read the owner’s manual from cover to cover (well, all right, I only read the part written in English), and then spend an hour or two running the unit on my desk in simulator mode.
Next, I take the unit out on the water and spend a day with its manual in my lap trying out all of its features. When I feel confident that I can get the most out of the unit, I start fishing with it, and that’s where the back-sliding begins.
In the case of a fish finder, I usually set it in automatic mode and only tweak the sensitivity once in a while, and maybe manually adjust the depth range when the computer isn’t keeping the bottom reading at the bottom of the screen.
Other than that, I let it run itself, and it isn’t long before I forget how to make some of the finer adjustments.
Then, when a fishing situation calls for maximum detail, I have to dig out the manual to find out how to back off on the filtering, speed up the scrolling and ping rates and shorten the transmitter pulse (if possible).
The way to get the most out of a fish finder all the time is to run it in manual mode, and laziness is my only excuse for not doing that. Even when I run a unit manually while fishing, I usually let the computer run it automatically while cruising between fishing spots.
This gives me a solid bottom contour reading but seldom shows fish, scattered baitfish or important structure or cover details on the bottom.
You and I would get a lot more out of our fish finders by running them manually all the time.
I used to worry about digging into a unit’s menu and experimenting with combinations of manual adjustments because I was afraid that I’d get the unit so fouled up that it would barely show me the bottom.
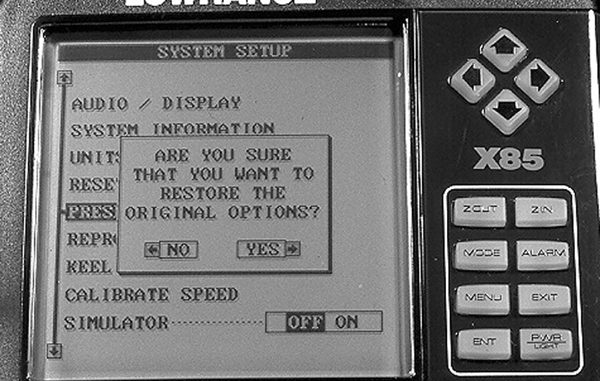
Then, I discovered that all units have a magic reset button that returns all adjustments back to their factory defaults. This command clears any unit’s slate, and lets you start all over again with the unit set up just like it came out of the box.
I no longer hesitate to dive into the menu and adjust everything, and I’ve discovered that it helps. I can get most fish finders to show me fine details like thin, scattered weeds, fish in weeds, fish stuck right to the bottom and even individual baitfish. These are things that few units show you while running in auto mode.
Practice with all your electronics. Dave Church at Si-Tex once told me that the time to learn how to get the most out of a radar unit is before you need it.
Spend an afternoon anchored in a busy bay, and discover how everything from personal watercraft on up to large boats look on the screen. See how well the automatic mode adjusts your set, then play with the manual sea clutter adjustment until you can spot navigation buoys and small craft riding low in the water.
The first time out on a rainy day with a new radar, practice using the rain clutter control while you are in a familiar area.
Practicing with a new GPS chart plotter is also a good idea. Learn the fastest way to save a waypoint, and the quickest way to label it so you’ll remember why you saved it.
Then, find out how close the new unit usually gets you to saved waypoints. Accuracy may vary in different areas, and you need to know what level of accuracy to expect before you have to navigate in darkness or poor visibility.
Can you get closer to a waypoint if you turn off the track smoothing feature? Is it easier to save a plot trail than to make a route out of separate waypoints? How far can you zoom in before you lose map detail in your favorite areas?
These are all things you can discover in an afternoon, and knowing them in advance helps your electronics improve your fishing and cruising experience.
And, there is wisdom in the old sayings, “Do as I say, not as I do” and “Practice makes perfect.”