
 Cut each rear leg from the inside side of each foot down to the anus.")
 Extend the cut on each leg across the top of the foot and ring the hide around the leg to separate the hide from the foot.")
 Pull the hide of each leg toward the body to expose the entire leg. Then hang the animal upside down by its feet.")
 Cut the hide loose around the anus.")
 Pull the hide downward to expose part of the animal’s back and the upper part of the tail.")
 Close a tail stripper (available from trapping supply web sites) over the tail bone, and pull it down firmly to free the tail fur from the tail bone.")
 Turn the animal around so its belly faces you. With the cutting edge of the blade facing upward, insert the knife through the hide at the throat of the animal and cut upward the length of the hide.")
 Use both hands to pull the skin downward to the front legs.")
 Use both hands to free the front legs from the skin; then cut the hide free from the feet.")
 Begin skinning the head by pulling the hide downward and outward with one hand and making short cuts with the other hand to free the hide from the skull. Cut the ears off at their bases and leave the ear cartilage intact on the hide.")
 Continue to cut and pull until reaching the eyes. Cut carefully around each eye to leave the eyelid on the hide. Do the same with the nose.")
 Insert a tail splitter (also available from trapping supply websites) into the tail, groove facing up. Using the splitter as a guide, cut the length of the tail with the knife blade facing up.")
 The finished pelt, ready for tanning, must have the ears, eyelids, and nose intact for best appearance.")
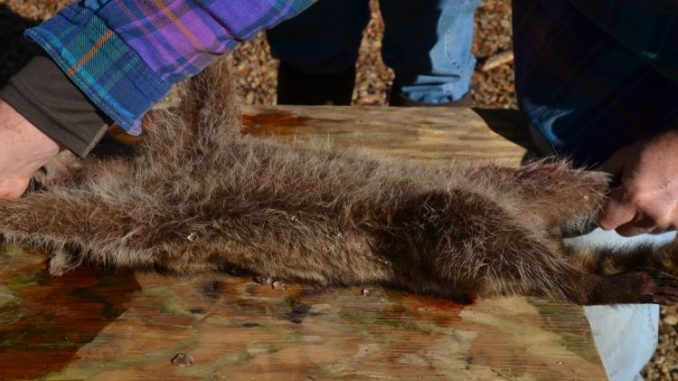
Hunter shares secrets to skinning raccoons
George Ricks skins his coons by the open-case method, which produces a flat hide, split down the belly.
Fur buyers, he noted, only purchase closed-case skinned coons. With this method, the animal is cut from one rear leg ankle to the anus, and from there out to the ankle of the other leg. The hide is then pulled off from the rear of the animal toward its front, like a person removing a T-shirt.
Ricks offered two bits of strong advice.
First, don’t use a knife with a blade longer than 3 inches. And, secondly, the blade must be razor sharp; learn how to use a knife sharpener and use it often.
Here’s how Ricks skins his coons (pictures above correspond with these steps):
1) Stretch a stiff carcass by pulling its front and back legs in opposite directions.
2) Cut each rear leg from the inside side of each foot down to the anus.
3) Extend the cut on each leg across the top of the foot and ring the hide around the leg to separate the hide from the foot.
4) Pull the hide of each leg toward the body to expose the entire leg. Then hang the animal upside down by its feet.
5) Cut the hide loose around the anus.
6) Pull the hide downward to expose part of the animal’s back and the upper part of the tail.
7) Close a tail stripper (available from trapping supply web sites) over the tail bone, and pull it down firmly to free the tail fur from the tail bone.
8) Turn the animal around so its belly faces you. With the cutting edge of the blade facing upward, insert the knife through the hide at the throat of the animal and cut upward the length of the hide.
9) Use both hands to pull the skin downward to the front legs.
10) Use both hands to free the front legs from the skin; then cut the hide free from the feet.
11) Begin skinning the head by pulling the hide downward and outward with one hand and making short cuts with the other hand to free the hide from the skull. Cut the ears off at their bases and leave the ear cartilage intact on the hide.
12) Continue to cut and pull until reaching the eyes. Cut carefully around each eye to leave the eyelid on the hide. Do the same with the nose.
13) Insert a tail splitter (also available from trapping supply websites) into the tail, groove facing up. Using the splitter as a guide, cut the length of the tail with the knife blade facing up.
14) The finished pelt, ready for tanning, must have the ears, eyelids, and nose intact for best appearance.
Click here to learn how to tan your hides.