
From my personal experience interacting with other hunters, a surprising number of trail cam users are perfectly happy for their camera setups to do nothing more than just take a buck’s picture as he passes by.
As in most aspects of life, though, what we get out of trail camera use is usually in direct proportion to what we put into it.
One of the most overlooked parts of scouting often times involves the proper use of trail camera setups. Unfortunately, the expectation, all-too-often, is to just slap a camera on a tree and wait for the deer photos to come rolling in.
There is so much more to it, but, really, the additional steps necessary to improve your personal trail camera outcomes are not that complicated.
Let’s go over a few of the more-important steps to optimize your setups.
• Location — As they always say in real estate, the name of the game is location, location, location.
That sounds so simple, but the reality of it is that on most hunting properties deer movement is seasonal, so a great spot in which to place a camera in September could very well be a dud in December.
During the summer and early fall, salt licks, water holes, and travel corridors to and from bean fields and other food stuffs make great surveillance locations.
Once late fall and early winter arrives, a prominent scrape or scrape line can be dynamite.
During winter, food sources are once again a good bet.
In a nutshell, you just look where the deer traffic is highest at a given time or season.
Outside of the rut, a deer’s daily activity pattern centers almost exclusively around its stomach. Beyond the food source itself, great camera sites include the travel corridors to and from feeding areas.
This gives the trail camera user multiple locations to identify for successful camera surveillance set-ups.
• Height — Whether you hang a camera high or you hang it low, there are advantages and disadvantages.
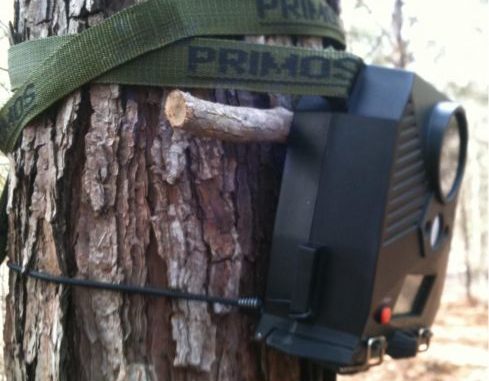
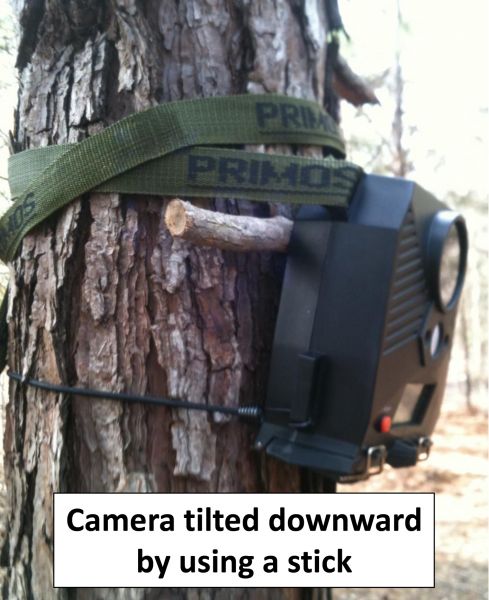
My tendency, whenever possible, is to place cameras at about the 6- to 7-foot level. Remember, though, that at an elevated height a camera will need to be cocked and pointed downward toward the spot or area on the ground where you expect deer to pass.
To elevate a camera properly, leave some slack in the mounting strap and wedge a stick or dowel just above the strap between the tree and the rear of the camera. This gets the camera itself up out of a deer’s normal plane of vision, but more importantly the camera itself is usually not noticed — and at night the flash is not nearly as likely to spook deer.
A possible negative trade-off, though, is the fact that whenever an estimation of buck age is important, a higher angle can at times make it more difficult to see and judge a buck’s neck and belly lines.
• Aiming direction — One key element in getting good photos involves a very simple but often overlooked step.
At every prospective camera site, look up in the sky or if it is cloudy look at a compass and estimate the approximate path and angle of the sun’s daily travel from the eastern horizon to the western horizon. And then, to prevent the sun from inadvertently triggering your camera and to avoid exposure problems from glare and backlighting, aim the camera as close to due north as possible.
A less-desirable second choice for aiming would be south, but try and avoid ever facing a camera due east or west.
Additionally, when placing a camera on a trail or travel corridor, try to orient the camera at approximately a 45-degree angle rather than head-on or perpendicular to the trail. This simple step will give you a wider viewing angle plus the added benefit of having a passing deer in the zone of detection and the field of view of the camera for a longer period of time.
• Background — Whenever possible, it is best to have an uncluttered, contrasting background such as distant trees, a field, water or a skyline. A really busy background that is full of tree limbs and shrubbery can make it difficult to see a buck’s rack clearly.
If a busy background is just impossible to avoid at a given location, hanging your camera higher on the tree with it cocked at a slightly downward angle sometimes solves the problem.
Following these rather simple steps can noticeably improve your photo results and greatly increase your odds of hunting success. So get yourself organized and experiment with exactly what methods and what camera locations work best on your hunting property.
Good luck this season as you commence preparations to find that perfect ambush spot.


")