A ‘how-to-tie’ guide for some of the most popular fishing knots
EDITOR’S NOTE: With fishing action ramping up as we head towards summer, we thought now would be a great time to start a series on several basic fishing knots that can be used by a variety of anglers.
Last week we highlighted the uni-knot – today we tackle the improved clinch.
Read the instructions below, then watch the accompanying video for great step-by-step visuals.
The improved clinch is a popular method for tying line to a lure, hook or swivel.
It’s ‘improved’ because the tag end in this knot is run through the loop created in the final step.
It’s great with lighter monofilament and fluorocarbon lines, but sometimes more difficult to tie with limp braids.
Remember to always moisten your line before pulling it tight, especially for fluorocarbon line that’s easily damaged by heat from friction.
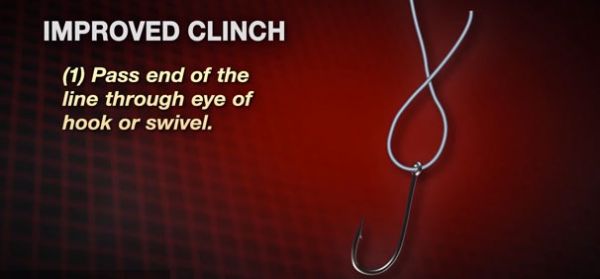
How to tie an improved clinch knot:
1. Pass the end of the tag line through the eye of the hook or swivel.
2. Pull about six inches of line through and double it back against itself. Twist the hook five to seven times. (You can also wrap the tag end around the mainline while holding the hook steady – either way works.)
3. Pass the end of the line through the small loop formed just above the eye of the hook, then through the loop just created. Be careful the coils don’t overlap. 4. Moisten and pull the tag end and mainline so that coiled line tightens against the eye. Trim excess.


")