Gain deer insights while feeding deer
Every year I take full advantage of the Mississippi regulation that allows supplemental feeding of shelled corn to deer by way of feeders between the first day of December and the last day of February of each deer season. The regulation allowing this practice is quite detailed and specific as to what you can and cannot do, so I would encourage any reader not thoroughly familiar with this regulation to go to the MDWFP Web site and check it out.
One of the key factors of the Mississippi supplemental feeding regulation requires that feeder sites be located at least 100 yards away from anywhere that you hunt and be screened from view by natural vegetation or terrain features. I am an absolute advocate of fair chase, and believe that this aspect of the regulation is extremely important and worthwhile.
I have three basic reasons why I go to the trouble and expense of setting up feeder sites during the annual rut cycle. The first reason is to provide a supplemental form of nutrition to the deer herd during the time of maximum winter/rut stress. The second is to give the does that use my property an additional reason to hang around because, of course, during the rut cycle where the females are the males won’t be far away.
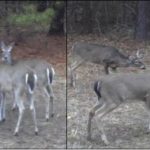
And, thirdly, by way of trail cameras, feeder sites give me additional locations to monitor and survey the dynamic population of bucks that circulate on and through my property.
Now, granted, some hunters prefer to hunt “blind,” so to speak, but my personal preference is to go to the woods with as much knowledge about what is going on as possible. It is just too easy to get discouraged if I am not seeing much from my stand on the days and at the times that I can go to the woods.
But if, by way of trail camera surveillance, I know that my intermittent personal observations are just unlucky and that buck activity is hopping and popping otherwise, I can hang tough and modify my comings and goings accordingly.
I use a basic triad of trail camera location types to monitor bucks during the rut. My web of cameras is divided between feeder sites, active perennial scrapes and pinch-point/funnel travel areas.
Over the years I have tried different types of feeders and setups, and through trial and error I have settled on a particular system that works quite well for me.
One the first details to figure out is the number of feeder sites needed to accomplish your goals without breaking your budget and creating too much work. The actual feeder locations then must be selected where they will be in compliance with the MDWFP regulations. Plus, each site needs to have a trail camera mounting tree located a few yards in a southerly direction from the actual feeder itself.
In other words, in order to maximize your results, don’t just plunk a feeder down and throw up a camera at the first place you come to. Put some thought into it, stay in compliance with applicable state law and you should get good results.
Over the years, I have used and experimented with several basic feeder designs and types, ranging from spin cast to gravity feed. For a variety of reason I have now settled on one particular type of feeder design that overall accomplishes my goals efficiently with a minimum of effort and trouble.
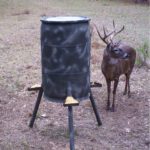
My favorite feeder design is built by Buckeye Feeders, which utilizes polyethylene drums that gravity feed corn through steel legs into perforated pans that drain rain water very well. Since it rains frequently here in the Deep South during winter, keeping your feed product dry and clean is very important.
There are three steel legs situated in a tripod fashion on each Buckeye Feeder drum, so I always align one of the feeder legs directly in line with my trail camera in order to have all three feeder pans in view. This configuration allows for a much better view of a buck’s rack and body as he uses the feeder.
My camera setup at each feeder site is relatively simple, but does involve a few do’s and don’ts. For the best overall daytime photo quality and to minimize false triggers, configure your setup with the camera located where it looks from roughly south to north toward the feeder at a distance of about 20 to 25 feet.
The tree used should allow for mounting the camera at a height of about 6 or more feet above ground level or just above your own head level. In order for this higher mounting configuration to work, the camera needs to be cocked at a slightly downward angle toward the feeder, which is accomplished by placing a dowel or stick between the tree trunk and the upper rear of the camera case.
This particular camera mounting configuration has several advantages over a lower, straight-on more “deer level” camera location. The advantages include giving you an improved view of a buck’s rack, plus making your camera less noticeable to its deer subjects. The latter point is important, as deer have their most acutely focused vision oriented in a horizontally wide but vertically narrow pattern. They do not see clearly much above straight-on eye level without cocking their head upward.
In my opinion, the advantages of an elevated camera mount outweigh any perceived disadvantages.
To minimize potential issues, I mount my cameras in an elevated fashion at all feeder sites regardless of whether the attendant camera is strobe flash, red glow flash or black flash.
If you are not already using this type of in-season trail camera feeder surveillance, give it a try. You might be surprised at how much additional actionable information you gain, and as a bonus it can be a heck of a lot of fun.
Get more information about Buckeye Feeders at www.buckeyefeeders.com, by calling 205-520-5552 or by emailing steve@buckeyefeeders.com.
