
Murphy Royer pours his own jigheads, as well as tying the jigs.
He pours 2 sizes: 1/16-ounce and 1/32-ounce, both with No. 6 hooks. The larger head is better for fishing in heavy vegetation, he explained, because it will fall through it more effectively.
He called the shape of the jighead he pours a “pan head,” and uses a mold he ordered from a tackle supply store and slightly modified.
For those who prefer not to pour their own heads, finished jigheads may also be purchased from the same sources.
His favorite sources for jig-making supplies are Cabela’s Tackle Craft, Barlow’s Tackle and Bass Pro Shop’s Lure Building Supplies.
Royer ties his own jigs because he is particular about colors, but mostly because he enjoys making them and fishing with his own lures.
Tools needed for making hair jigs include a monofilament loop threader, a toe nail nipper clipper, a fly-tying bobbin, a pair of sharp scissors and a fly tying vise.
Begin by clamping a painted jighead in the vise, and loading wax thread in the bobbin. This thread will bind the chenille body, fin and tail to the jighead.
Tying the jig
1.) Make 15 wraps of the thread around the shank of the jighead shank.
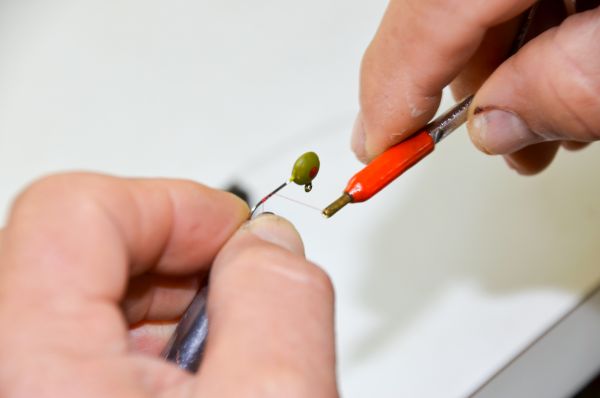 2.) Isolate 10 strands of tinsel chenille for the tail of the jig and cut them 1 ½ inches long. Then hold the strands along the shank of the hook with one end of the strands butted up to the jighead, and wrap thread the length of the shank to the curve of the hook to secure the tinsel chenille.
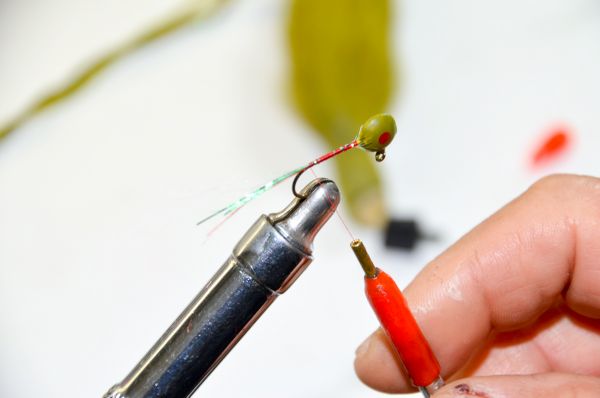 3.) Separate a clump of kip tail for the jig’s tail and cut it loose with the nipper clipper. Trim cut end even. Place the clump of kip tail along the shank of the hook halfway down the shank of the hook. Wrap thread over the kip tail to the bend of the hook and then back to the jighead and stop.
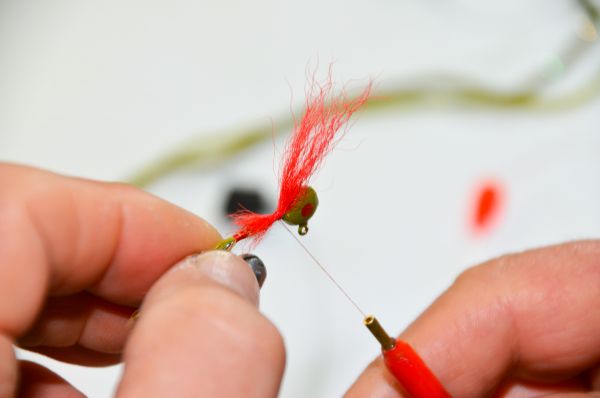
 4.) Cut the same amount of kip tail of the color of your choice for the jig’s fin, and place it on the shank facing in the opposite direction of the tail. Wrap enough thread to secure the fin, first to the jighead and then back to the bend of the hook and stop.
 5.) Apply bead cement glue to the wraps.
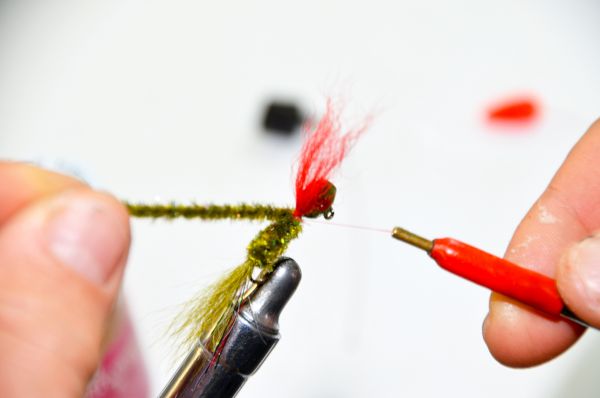
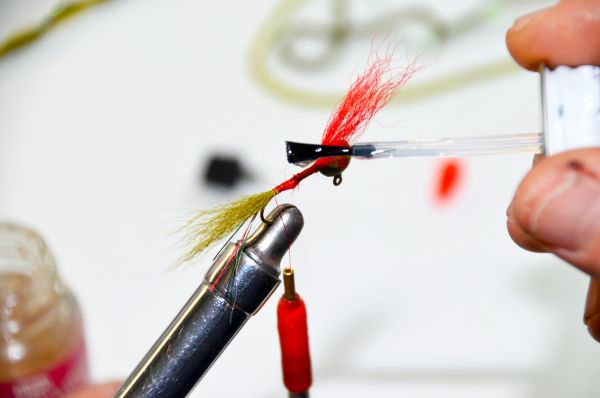 6.) Cut two 2-foot lengths of chenille and twist them tightly into one strand. Two inches of the twisted chenille will be used for each jig. ) Secure one end of the twisted chenille to the hook shank near its bend with thread. Continue wrapping the thread to the base of the fin.
 7.) Once the end of the chenille is secure, twist the two chenille strands together tightly and wrap the chenille the length of the hook shank.
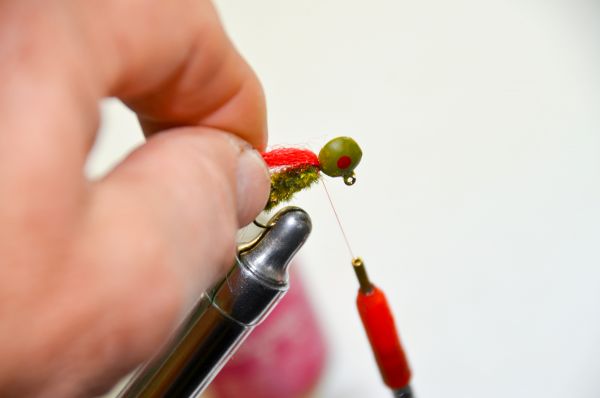
 8.) Wrap three wraps of thread around the base of the chenille, followed by six wraps around the throat (the base of the chenille body and the jighead). Cut the remainder of the chenille off with the nipper clipper and squeeze the chenille wraps down to the glue already on the hook’s shank.
 9.) Bend the fin away from the jighead (toward the hook bend) and, while holding it, fill in the throat with thread, covering the base of the fin. This secures the fin pointing toward the rear of the jig.
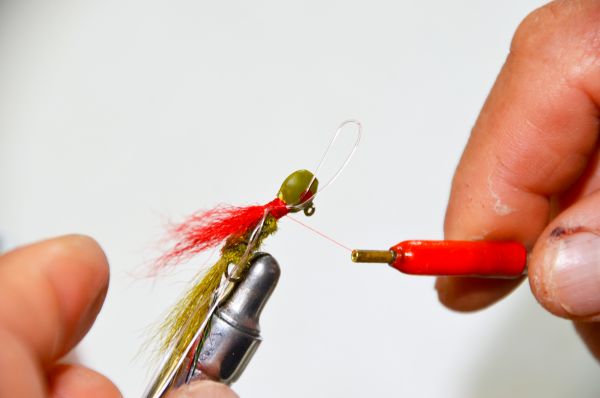
 10.) Place a monofilament loop from the threader so it extends 1 inch beyond the head and wrap it 15 times with thread. The mono loop will be used to pull the loose end of the thread under its own wraps.
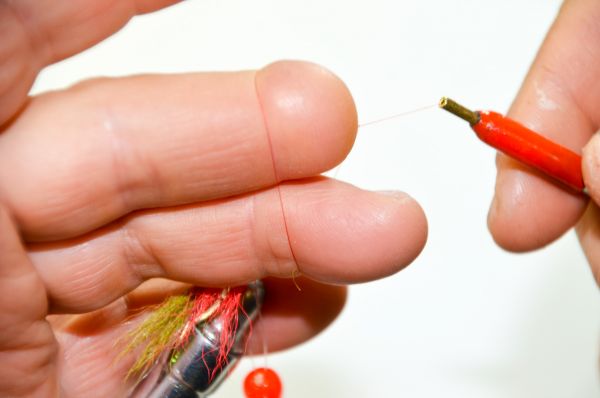
 11.) Insert the thread into the mono loop with the tip of the bobbin to make a loop in the thread. Insert two fingers into the thread loop, and then cut the thread between the fingers with the clippers. Lay the clippers down, and with the free hand pull the thread until it is tight. Trim off the tag end of the thread to ¼-inch from the jig.
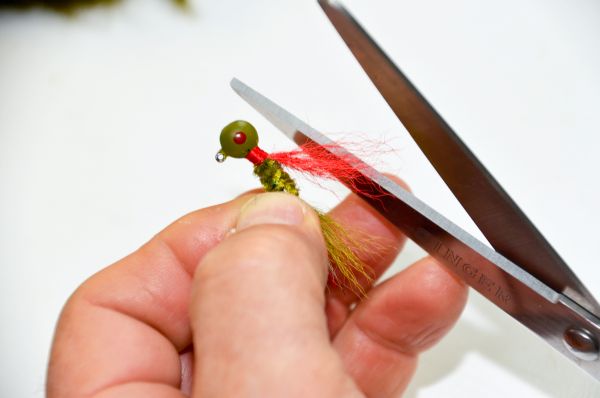
 12.) Remove the jig from the vise and use scissors to trim the wing and tail as desired and to remove any lengthy hairs.
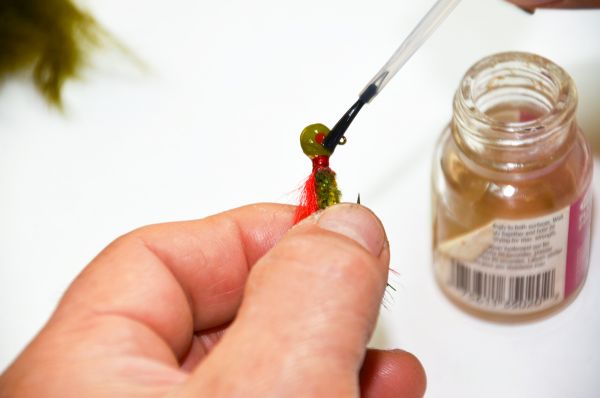
 13.) Apply glue to the head and throat of the jig, and hang it from a nail until dry.

")
")