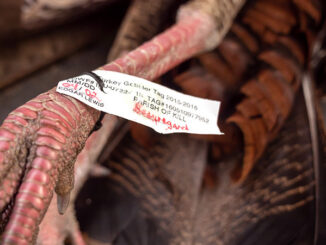
The Baton Rouge area offers plenty of public ponds that present anglers young and old the opportunity to fill their stringers.
Accessory wiring in your boat can be a blessing if it is done correctly or an absolute nightmare if not. Wiring is relatively easy, but there are many pitfalls to avoid in order to have a reliable and safe system. Your 12-volt battery has a positive and a negative terminal. All of the accessories that you install will have a positive and negative wire attached to them. If you simply hook the positive wire to the positive battery post and the negative wire to the negative battery post, that accessory will be activated.
Unfortunately, it isn’t quite that simple. You will need to have an on/off switch and a fuse or circuit breaker for each accessory. This is where you have to watch out for those pitfalls.
The first thing I like to do when rewiring a boat is to make a list of all accessories that will be installed in that rig. Some, like VHF radios and GPS units, come equipped with on/off switches; most others do not. Next I have to determine what size fuse or circuit breaker will be required for each item.
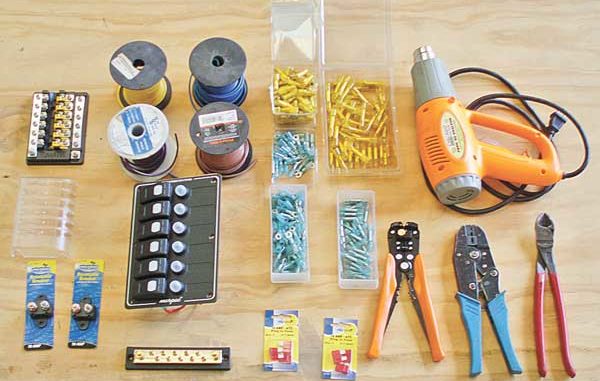
Once I know how many accessories I will be installing, it is time to start shopping for switches, circuit breakers, fuse panels, terminal blocks, wire and terminals. This is the time that you have to be most careful. Your boat will be subjected to an extremely harsh environment.
All of these accessories and their corresponding switches and wiring systems will be exposed to wind, rain, sun and harsh chemicals. The salt air alone is enough to corrode and render most wire connections inoperable. Boat bilges can be contaminated with fuel, grease and other chemicals that will eat away at your wires. It is extremely important that you purchase quality marine switches, wire, terminals and all other components for your accessory system.
Once I have all my supplies, I will begin by creating wire harnesses for all of the accessories. In the rear of the boat, there will usually be a bilge pump, livewell pump, anchor light and washdown pump. I will make up a set of eight wires for this harness. Four of the wires will be black, and they are used for the ground wire on each accessory. The other four wires will each be a different color for the positive connection on each accessory.
Once each positive wire is assigned a specific accessory, I will note these colors on a wiring diagram so that I can attach each to its proper switch location on the dashboard. The wire harness will then be routed through the hull to the dashboard area.
At the dash, I install a terminal block with sufficient terminals for all accessories. This terminal block is used for all of the negative wires to attach to.
One of the many pitfalls that I have seen on boats is the practice of attaching each of the ground or negative wires to the battery negative post. When you hook up numerous wires on a battery terminal, it becomes very easy to have one of the wires left unattached, and it is usually very difficult to find that loose wire. If you attach too many wires to the battery post, you will eventually run out of threads for the wing nuts to screw onto and the connection is weak and can cause other problems with your system.
In order to avoid this problem, I recommend that you run a pair of 10- or 12-gauge wires, one red and one black, from the positive and the negative post of the battery to the dashboard. Attach the negative wire to the ground terminal block, and the positive to feed the circuit breakers or fuse panel. The positive wire should be hooked to a circuit breaker of sufficient size as to protect the entire accessory system if every item were to be turned on at the same time. This breaker should be located as close as possible to the battery. If sometime in the future you lose all of the accessories at the same time, then you would check this breaker.
The positive wire from the battery should be attached to the inlet side of the fuse or circuit-breaker panel. The power is then jumped from one fuse to the next so that all fuses are energized. The outlet side of each of the fuses is then attached to the appropriate switch. The wire color for each of the accessories’ positive wires is then matched to its switch and installed on the outlet terminal of that switch. This will complete the accessories in the rear of the boat. I can now begin to hook up the accessories on the dashboard.
Accessories such as a radio that has its own on/off switch will not have to be hooked up to the switch panel. The negative wire will attach to the ground terminal block and the positive will be attached to a fuse or circuit breaker. Once the dashboard accessories are hooked up, the last step will be to wire any other accessories in the boat. This could include navigation lights, courtesy lights and spotlights. The procedure is the same as the hook-ups for the accessories in the rear of the boat. Wire harnesses are made up and routed to the dashboard where the negative wires are attached to the terminal block and the positive leads are hooked to switches.
When wiring your boat’s accessories, you will probably use many terminals and connectors for all of the wires. It is very tempting to get the inexpensive crimp-on terminals and a cheap set of crimping pliers and just have at it. The terminal ends of your wires are the most susceptible locations for corrosion to attack your accessory system. There are terminals specially designed for marine use that have a heat-shrink plastic made onto them. You strip back your wire, install the terminal and crimp it in place. Then you take a heat blower (hair dryer), and heat up the plastic. As the plastic heats, it shrinks around the wire and emits hot glue that seals the connection from moisture and other harmful elements.
If you have any questions about your boat, motor or trailer, you can reach me at theboatdr@yahoo.com.